Be warned, this is quite a long post!!
 |
| This photo is not advertising, it is just showing all the different types of foundation there are out there!! |
Just so you know already, in this post there will be:
*Coverage -different products-
*Selection -tones-
*Applying foundation -and tips & tricks-
*Application tools -the best brushes to use-
Starting with coverage.
Coverage is one of the most important factors to consider when choosing a foundation. No matter how bad you think your skin is, almost nobody needs 100% coverage. One of the biggest misconceptions about foundation is that it is the answer to all of your skin problems. Unfortunately, this results in people wearing foundation as a mask and missing out on the opportunity to show off their skin’s natural texture.
Heavy coverage : Heavy or full-coverage foundations, usually compact or cream based. I wouldn't recommend using this as it can result in looking caky and really obvious you've got tons of makeup on.
TIP = If your makeup does go caky, press some moisturiser over the top of your makeup to freshen it up
 |
| This photo is an example of caky foundation, obviously it has been exaggerated, but it doesn't look good! You can see how the foundation doesn't match her neck very well, and it hasn't been blended or buffed into her skin, it's like a mask. So be careful going for a heavy coverage. |

Light coverage : Tinted moisturizers, or very thin liquid foundations are perfect for people with very good skin. If you don’t need any coverage, just some colour to even out your skin tone, a product like this can work as your foundation, moisturizer, and highlighter without adding excess product. These can cover unevenness and slight blotchiness, but is not opaque enough to cover freckles

Now for selection :
.jpg)
Most people say you must have an exact match of foundation to skin tone, but using a slightly different tone to your face can be a good idea.
For example, a red complexion can be minimised by using a clear (meaning neither yellow nor pink) beige toned foundation.
A sallow or dull complexion can be brightened with a rose to red to tint mature skin that has lost its color and appears pale and dull can be brightened with a tint of clear pink.
Olive or ashy skin can be brightened with a shot of peach.
A crucial point in selecting a foundation shade is to recognise that the appearance of the shade in the container may not accurately gauge the colour impact on the skin — a foundation that appears very yellow in the bottle may go on much less yellow, or not appear yellow at all. Always test on your neck to match to your face, also try your jawline.
TIP = most cameras bring out the pink tones in the skin which can leave your face looking so neutralise the skin toe with a yellow toned foundation whether you have pink tones or not
Applying foundation:
I would definitely recommend applying your foundation in a naturally lit room so you can see how it looks when you will be outside.
Steps:
1) Wash your face and apply a light moisturiser and primer
2) Apply foundation to the back of your hand and use the application tool of your choice to spread evenly and thinly over your face, blending outwards so that the edges of your face hardly have any product on them (See next chapter of post to see -application tools-)
3) Go back and apply another thin layer to any areas with heavy pigmentation and then apply concealer to your problem areas (optional)
4) When foundation is still semi-wet, buff into skin for a natural and airbrushed finish
5) Make sure your foundation is even and then dust over face with a powder of your choice (I will write a little about powders after the chapter -application tools-)
 |
| And when you're done you will look B.E.A.U.T.I.F.U.L |
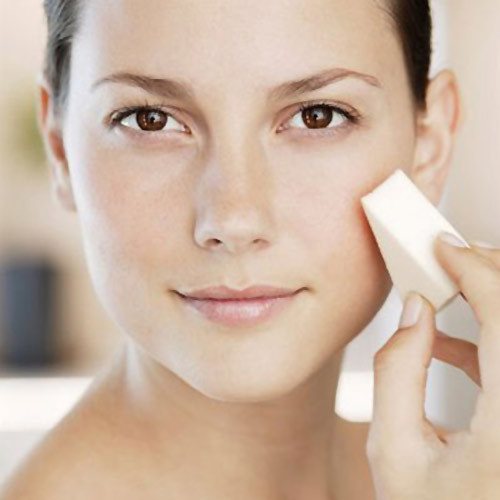
There are various tools that can be used to apply foundation including your fingers, a sponge, and several varieties of foundation brushes, each providing a different finish.
Before applying foundation always start with clean, moisturized skin. Any dry, flaky skin patches will be highlighted when makeup is applied so users should exfoliate their skin first if required.
- Fingers: Using your fingers is great for creating a natural look. The natural body heat in your fingers helps the foundation to melt into your skin and it’s easy to blend in a sheer layer of makeup. Using your fingers isn’t recommended for applying full cover makeup though as streaks and finger marks can occur.

- Sponge: Using a sponge to apply foundation is great for creating a sheer to medium cover look. A triangular sponge is good for blending in liquid foundation and concealer, whilst a rounded sponge is best for powder foundations. Wet a clean sponge with water first: the moisture will help prevent the sponge from absorbing the makeup and will also assist in blending. Reusing sponges can be unhygienic, so sponges should be washed and dried thoroughly after every use.
- Brush: For liquid foundation, a brush with a synthetic bristle is recommended as the brush won’t soak up too much of the liquid. Alternatively, a natural bristle which is more porous works best for powder foundations such as mineral makeup. A densely bristled brush is best for foundation as it is less likely to leave tell-tale streaky brush marks. As with all tools used to apply makeup to the face, brushes should be soft and gentle, as anything too stiff will scratch and irritate the skin.

- Airbrush: Liquid foundation is applied with an air stream. The airbrush mixes the foundation with a controllable stream of compressed air. It adheres with the skin as millions of tiny droplets of foundation. This technique can create an even, sheer, natural appearance to the skin that, if applied properly for a natural look, can appear natural and non-heavy like traditional makeup. Airbrush makeup application is also frequently used in special effects makeup.

If you take any tip out of this post, please let it be that foundation is not a replacement for concealer; acne, scaring, or other more serious skin problems can be easily covered by the right concealer but foundation is not the answer. If you have extreme skin redness, consider a green correcting primer.
Woah!! That was a long post, but I hope it has been useful to some of you out there!! ]
Toni :D x
No comments:
Post a Comment